Find It Overview
I. Features
- Intuitive, Structured Authoring Experience for Service Providers
- Easy but Powerful Search for Residents
- Informative Opportunity Pages
II. Communities Using Find It
I. Features
1. Intuitive, Structured Authoring Experience for Service Providers
The value of a directory are the listings within it. It is truly a community effort to assemble enough accurate and up-to-date resources in a single place for it to be useful. For Cambridge, the service providers that work at government agencies and nonprofits are the lifeblood of the directory. Without them, there would be no Find It Cambridge.
For these service providers (many already pressed for time), Find It is a system that is easy enough to take the time to enter information into, and which conveniently structures the data so that it can easily be searched and filtered on by community-members looking for opportunities.
Through user research, we mapped the information architecture to the mental models that service providers hold for their events and programs.
Input Fields Grouped by Key Questions
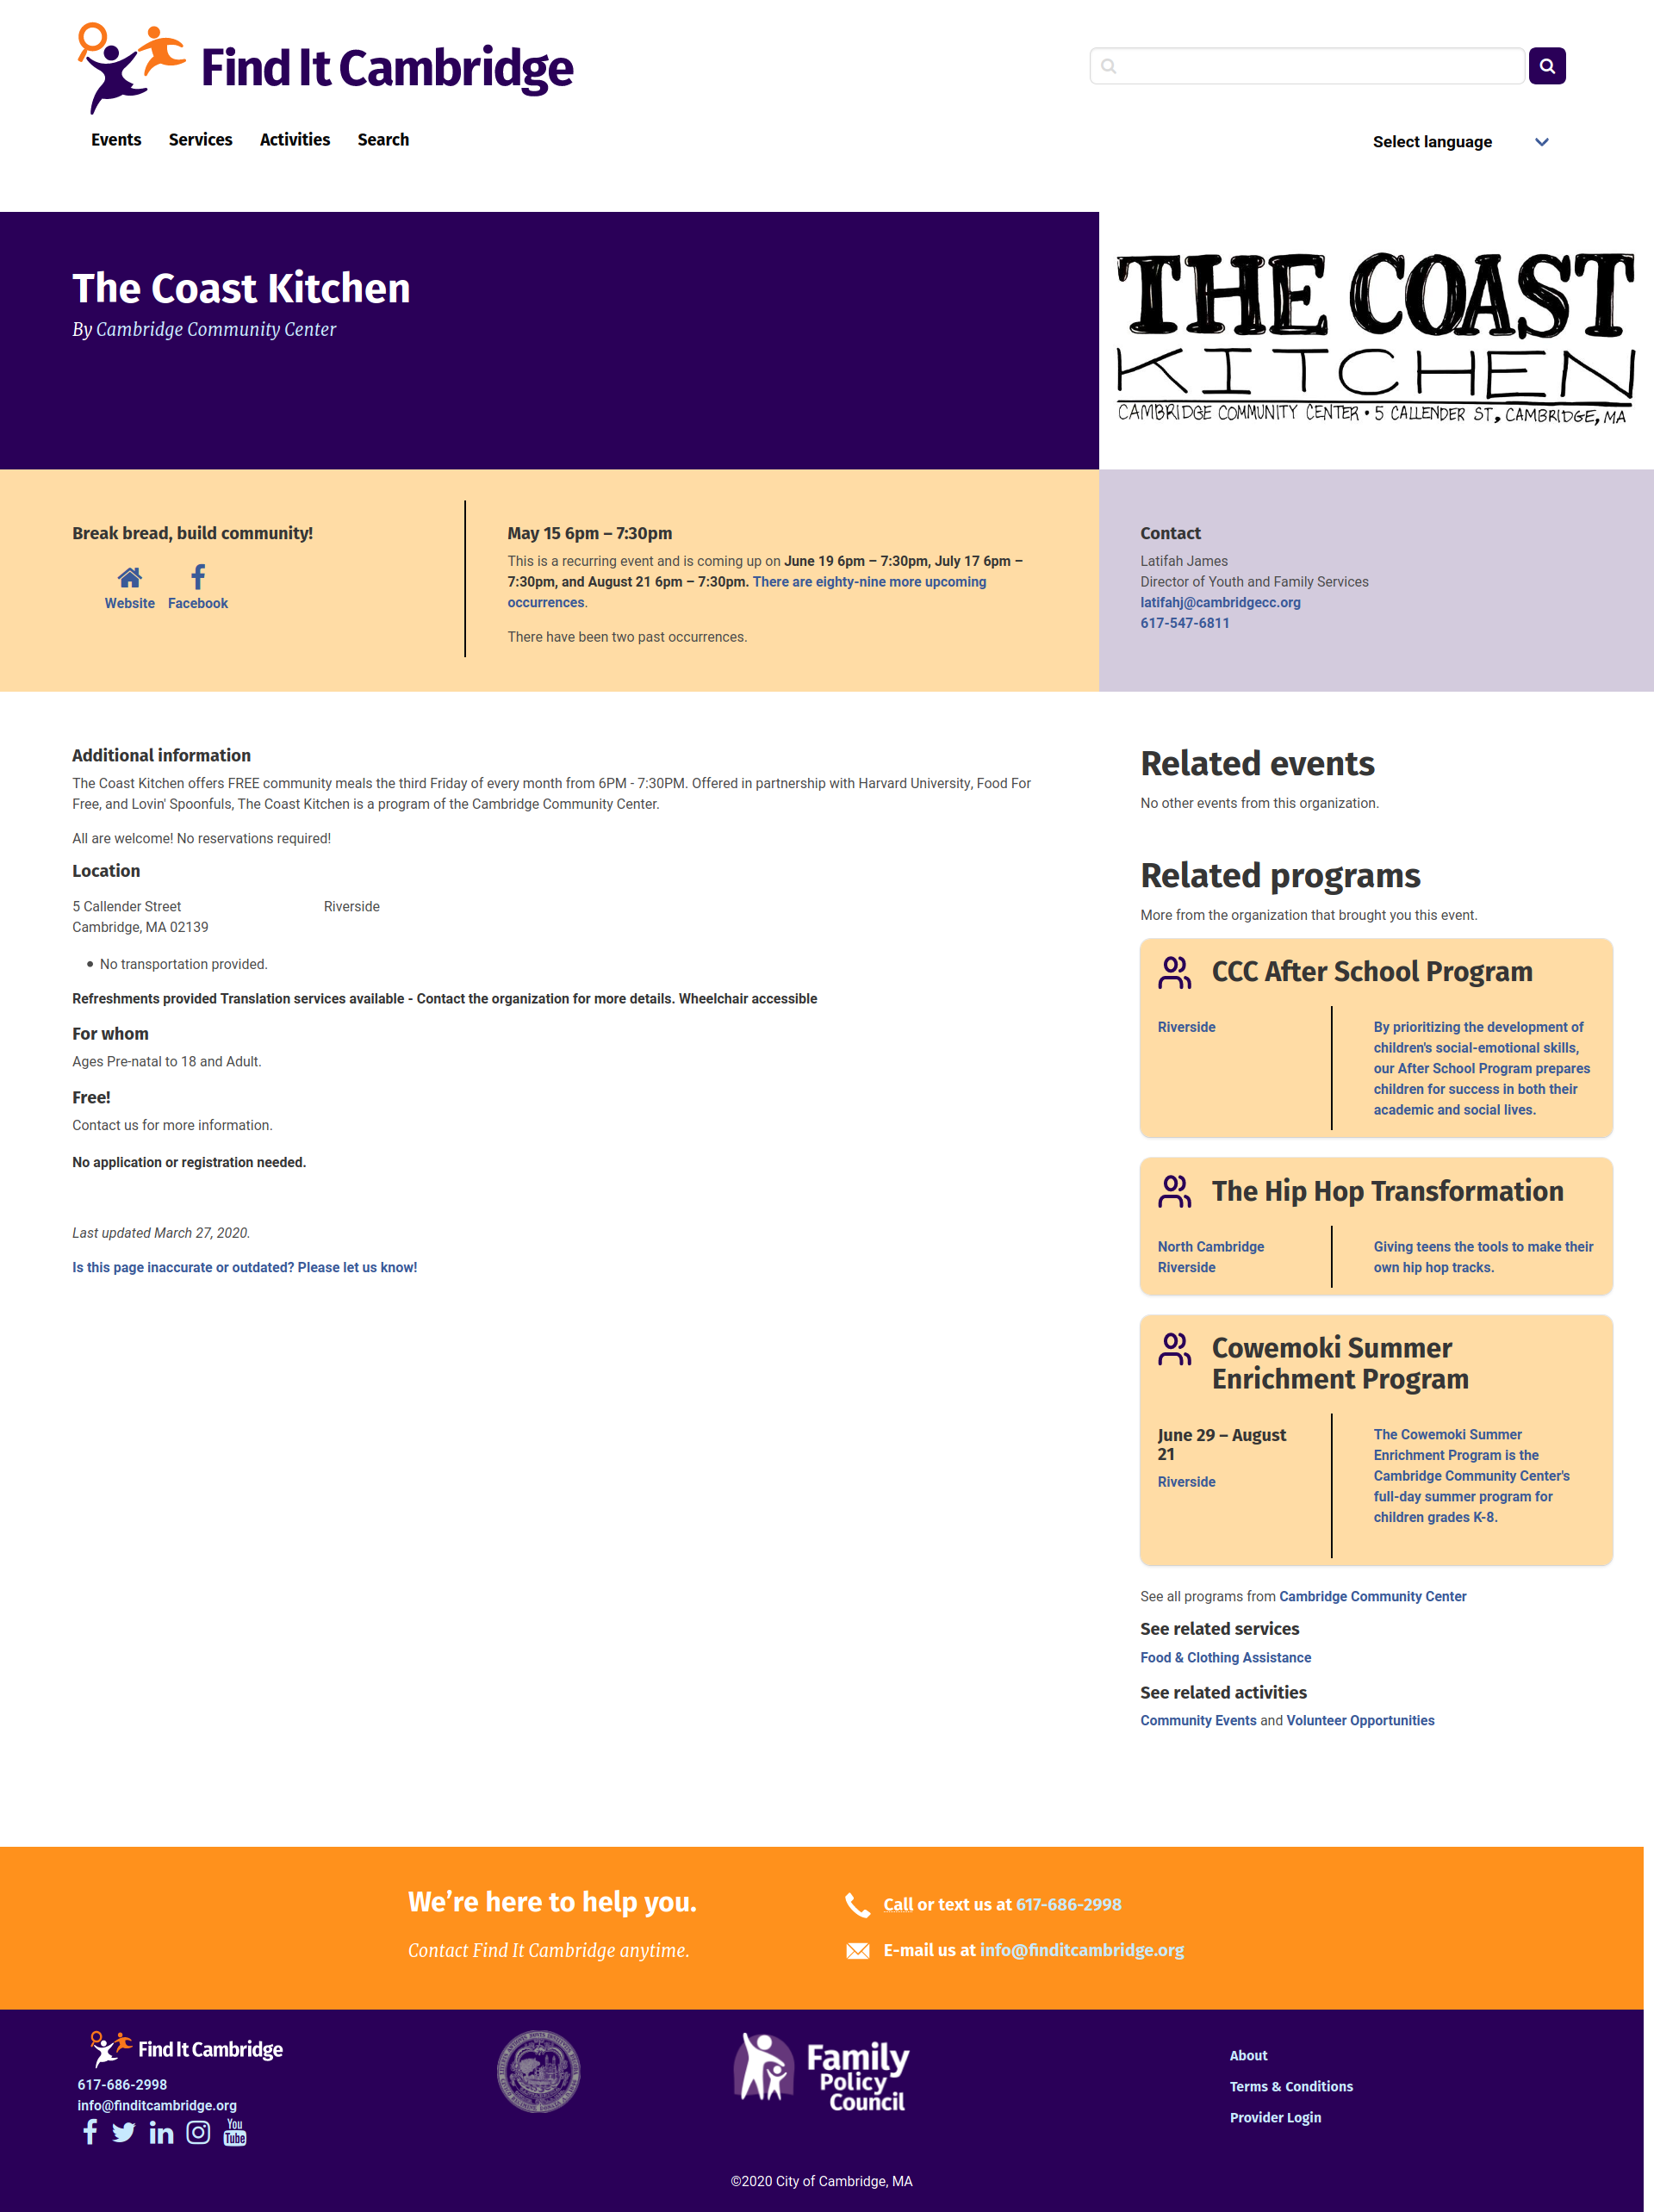
Most service providers thought of their events in terms of what the event is about, how to contact the organizers, who it is for, when it is happening, where it is happening, how much it costs, and if there is any sort of registration required. So we organized fields into working tabs to match: About, Contact, For whom, When, Where, Cost, and Signup.
Autosave and Soft Required Fields
Even with fields grouped by tabs, the form can take some time to complete. That is why we introduced autosave and soft save features. When working on a form, the site automatically saves the current draft every few seconds. Service providers can also save a draft to return to later. Fields that are required for publishing, are optional for a draft.
Draft States to Save Work for Later
Service providers have many responsibilities to juggle. It is important that they can start creating an event or program, save it and return to it later before publishing it.
Drupal has powerful workflow states, which we have put to use to help service providers clearly know the status of their content.
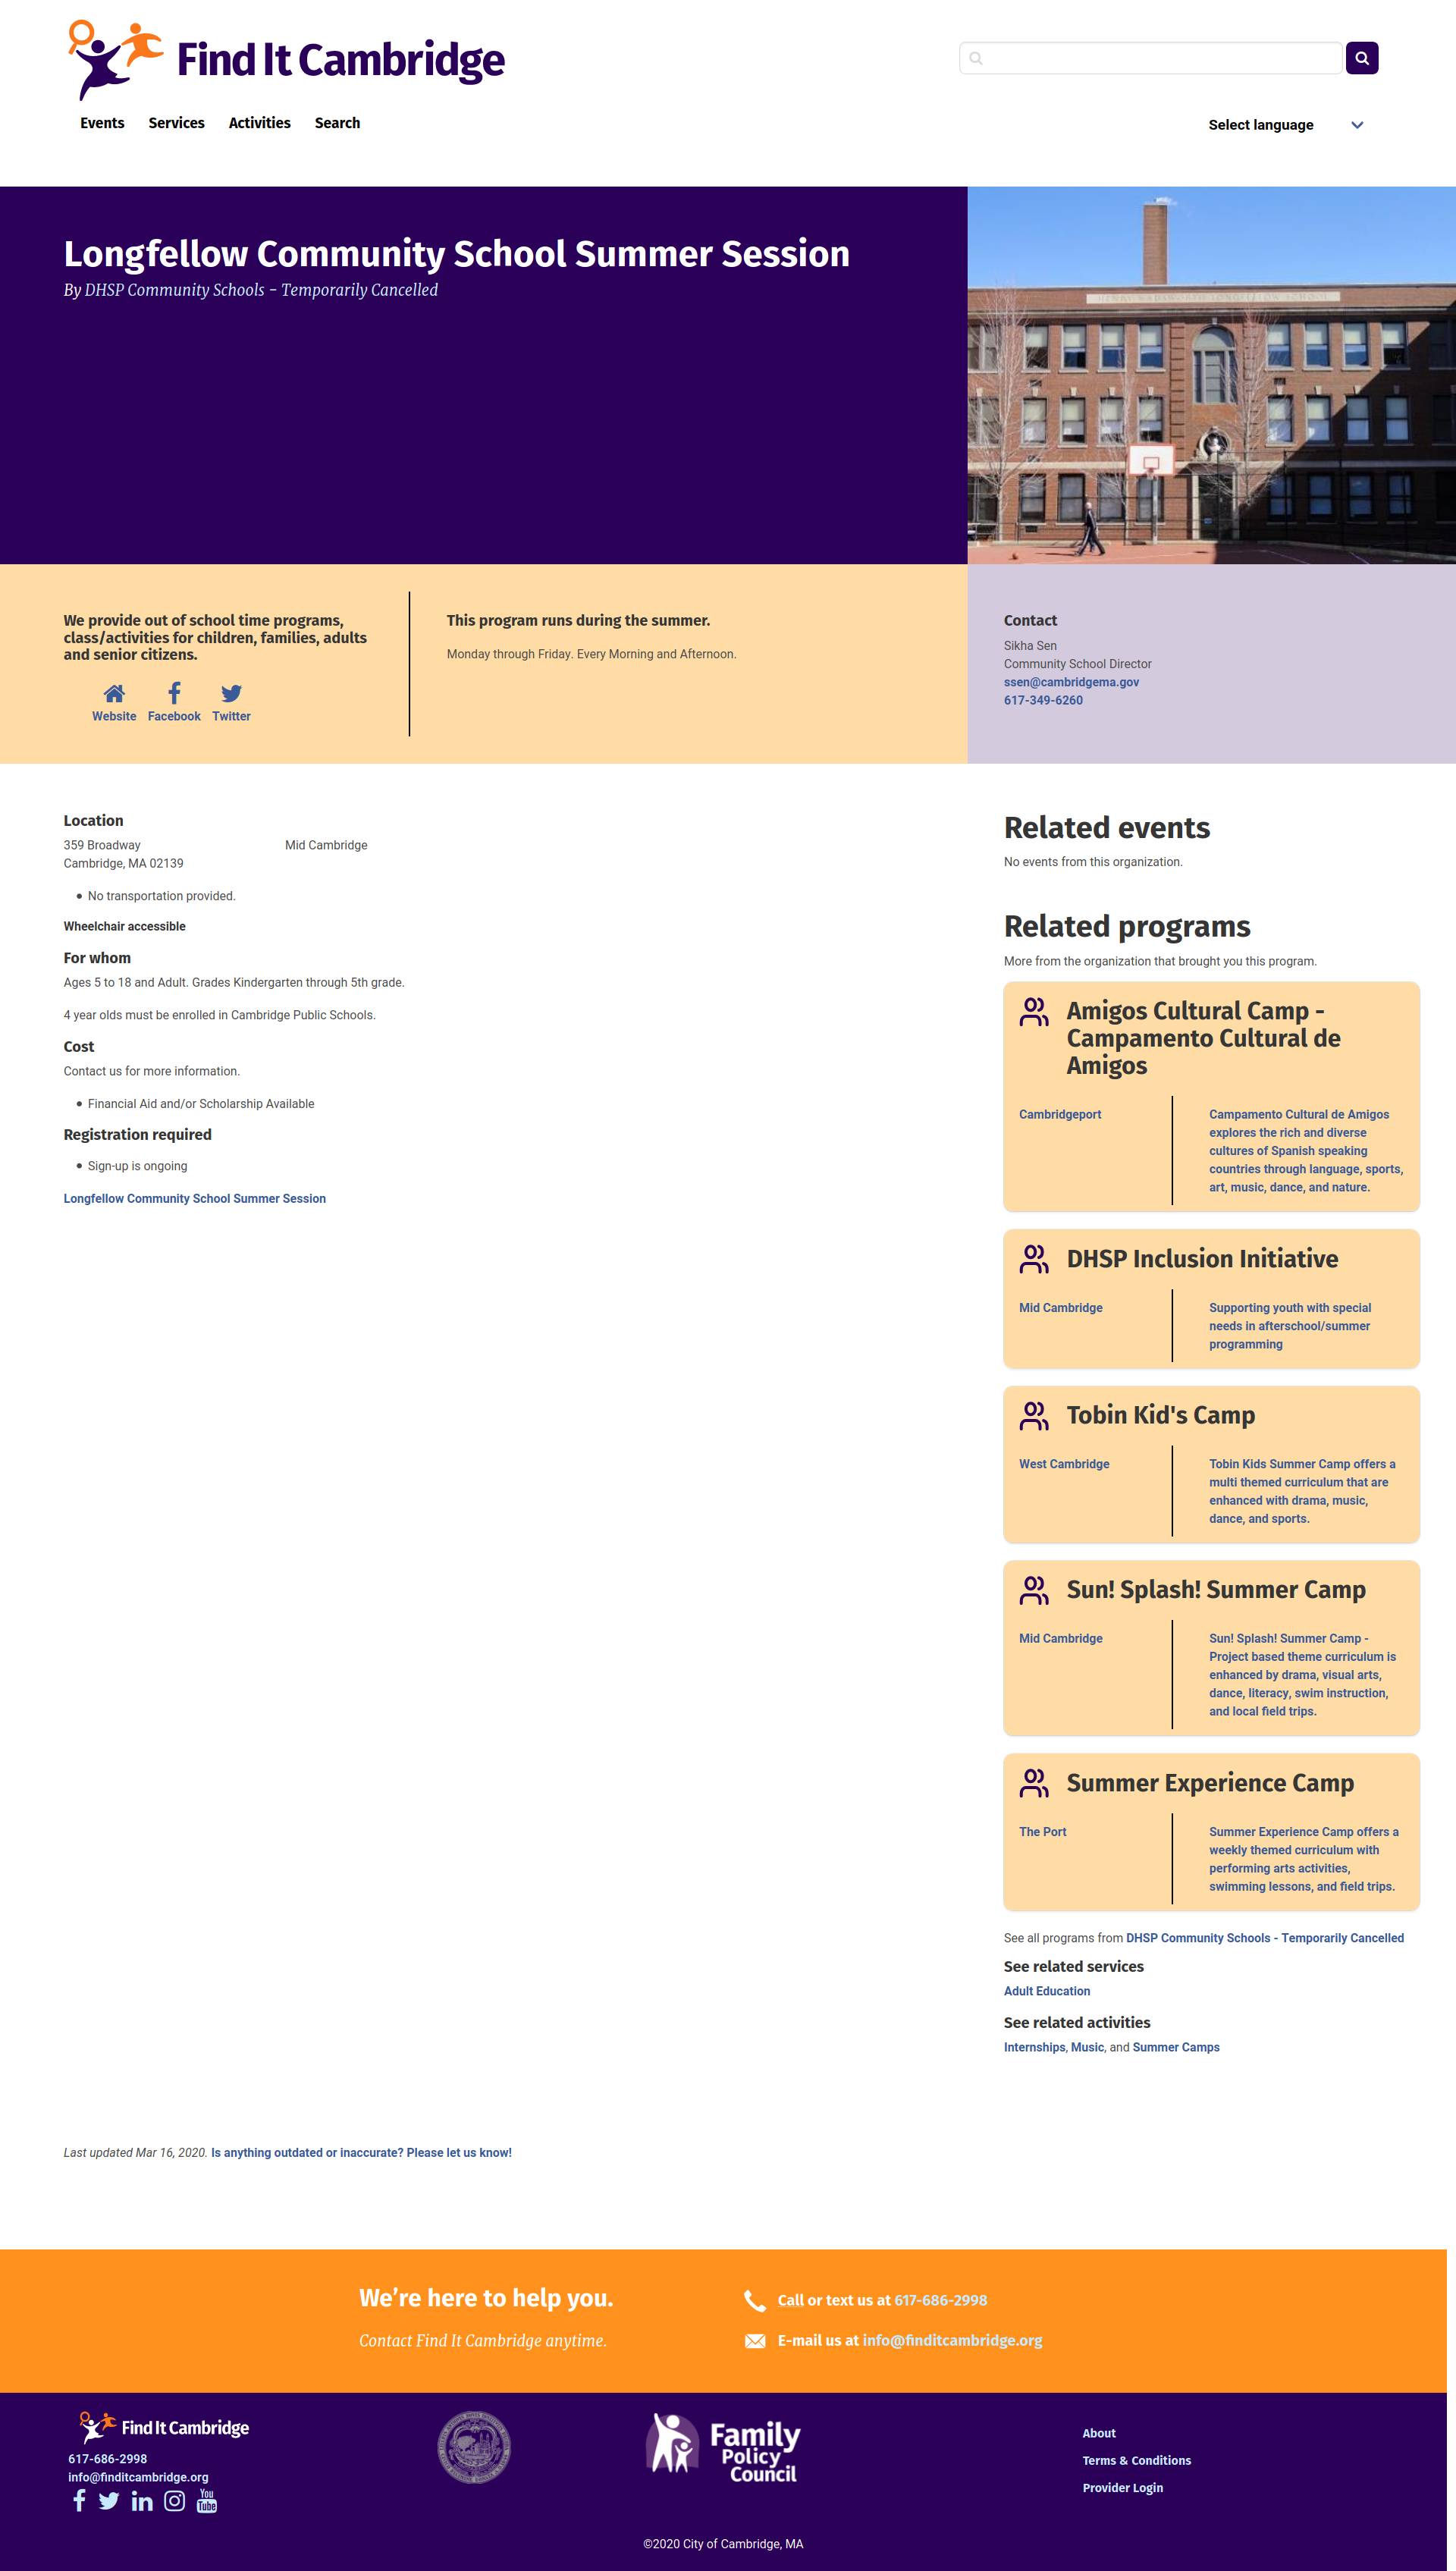
A service provider can either save their content as a draft or publish it immediately. If saved as a draft, a banner appears on the page clearly indicating that the event or program is not yet published.
Authors can also create a draft alongside a published version. This allows new versions to be worked on, while maintaining the current page for site visitors.
Help Text and Character Counts for Guidance
There are particular ways to write and format content on events and programs to make the most of Find It's features. We provide help text along the way to clue providers in on the best ways to write their content. We also include a character count so providers know if they are staying within the recommended limits for certain text fields.
Bulk Select for Quick Data Entry
Certain fields have many options. In some cases the majority of them apply. For example, many educational events are for all ages up to 18. In that scenario, having a "Select All" option speeds up the data entry process. The Selectize JavaScript library adds elegant toggle and check all options to multi-value fields. We created the CheckboxesJS Drupal project so that other Drupal sites can easily incorporate these features on fields of their choosing.
Conditional Fields to Show Only What is Relevant
Some fields on Event and Programs only need to show under certain conditions. For example, if an event does not require registration, then there is no need to worry service providers with a registration link field. Using conditional logic keeps forms simple and streamlined.
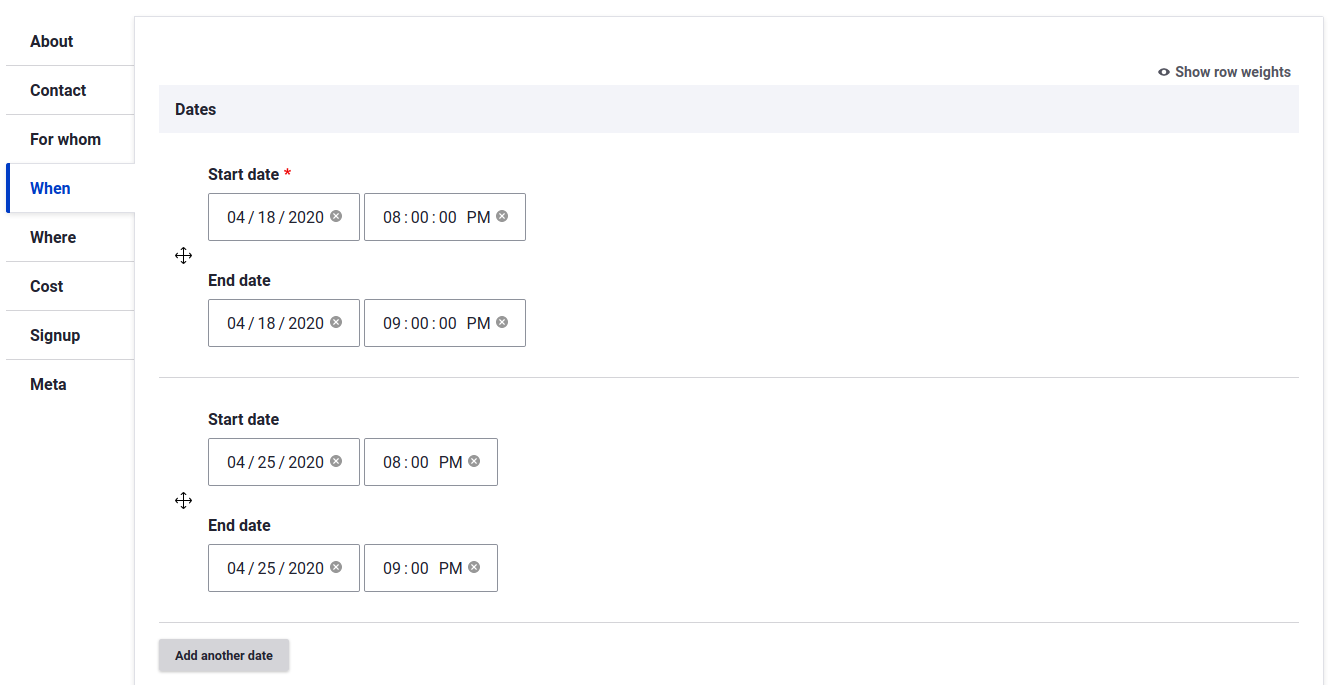
Multiple Dates
There was a lot of discussion on whether to support repeating rules or instead allow multiple dates. We decided on multiple dates, as experience has shown that even repeating events oftentimes have exceptions (and because the events we import from Cambridge Public Libraries are a list of arbitrary dates rather than a recurring rule, and somehow no one in computer science has created a library to produce a best-effort recurring rule from a list of dates).
2. Easy but Powerful Search for Residents
Find It search is powered by Apache Solr, a popular open-source enterprise search platform. We use its numerous features to make the search results as relevant as possible for site visitors. It is an ongoing process of tweaks; here are some of the things we have done so far.
Weighted Fields for Relevance
On content with lots of data like the events and programs of Find It, certain fields carry more importance than others. The title of an event, for example, is one of the most important. The transportation notes, on the other hand, carries less significance in search queries. When someone types the keyword "music lesson", an event with music lesson in the title or summary shows up before a program for English lessons.
Synonym Matching
When someone searches "childcare" but a program uses "child care", the search engine should know these are equivalent. The same is true for "STEM" and "science education."
Find It supports synonyms. The site manager can define synonyms so that when site visitors search for a certain term, results with matching synonyms show up as well.
Key Information in Search Results
We used the results of our user research to show the critical information people need to pin point the right opportunities: title, neighborhood, and a short summary.
Filters for Sophisticated Queries
Filters help users narrow a search query down to specific criteria. In our testing, we found that age and neighborhood were most important, especially for low-income caregivers. For those of us that rely on public transportation, events and programs need to be nearby. We placed these filters accordingly towards the top of the page.
Naming conventions in Cambridge are unique, which is true for other cities too. Residents might not know the official name of their neighborhood or live at the border between two. We have included a labeled, clickable map to help users choose the right neighborhood. We built this so that other Find It platforms can upload their own SVG map to show their neighborhood.
3. Informative Opportunity Pages
Find It comes out of the box with four different types of opportunities: Events, Places, Organizations and Programs.
Organization
The organization serves as the foundation for opportunities posted on a Find It page. Every event and program posted to Find It, belongs to an organization. This helps an organization's page serve as a mini-website. When an event or program is published, it automatically shows up on its organization page.
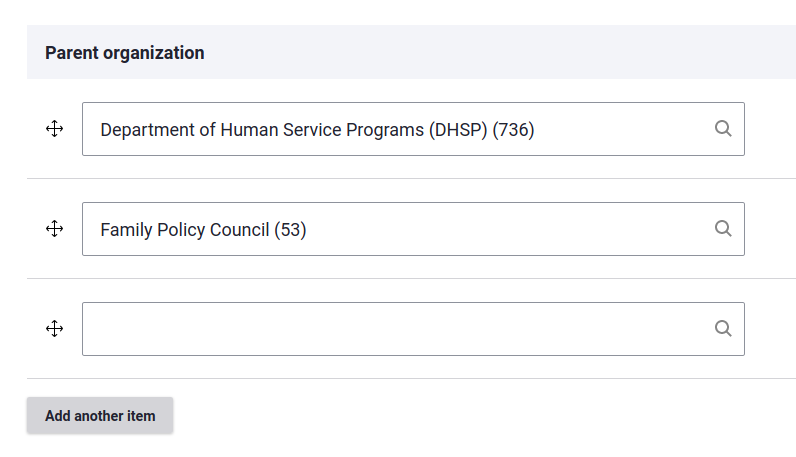
Organizations can also have "child" organizations, which is helpful for larger groups that might have distinct sub-committees or departments that have sub-departments.
Event
An event is an opportunity with a clear start and end date. When an event is published it shows up on the Homepage, Events page, Search page and on the organization's page.
Visitors can sort opportunities by start date to find upcoming events.
Program
A program is similar to an event. In fact, most fields are shared between the two. A program though, implies more longevity and commitment than an event. Rather than requiring a specific date or dates, a program can simply be "ongoing." There is the option to include specific dates though.
Place
In the first version of Find It Cambridge, a new opportunity surfaced that did not quite fit into the event, program, or organization categories. Parks, neighborhood pools, and other destinations were a good fit for Find It's library of opportunities. They have open hours, but many of the event fields were irrelevant. The same went for Programs. In fact, sometimes these places have events or programs happening at them.
These are community-minded destinations people can go to. In other words, places.

II. Communities using Find It
Find It Cambridge
Curated by members of the Cambridge Kid's Council, Find It Cambridge was designed to help busy parents stay informed about the plethora of educational opportunities available for their children.
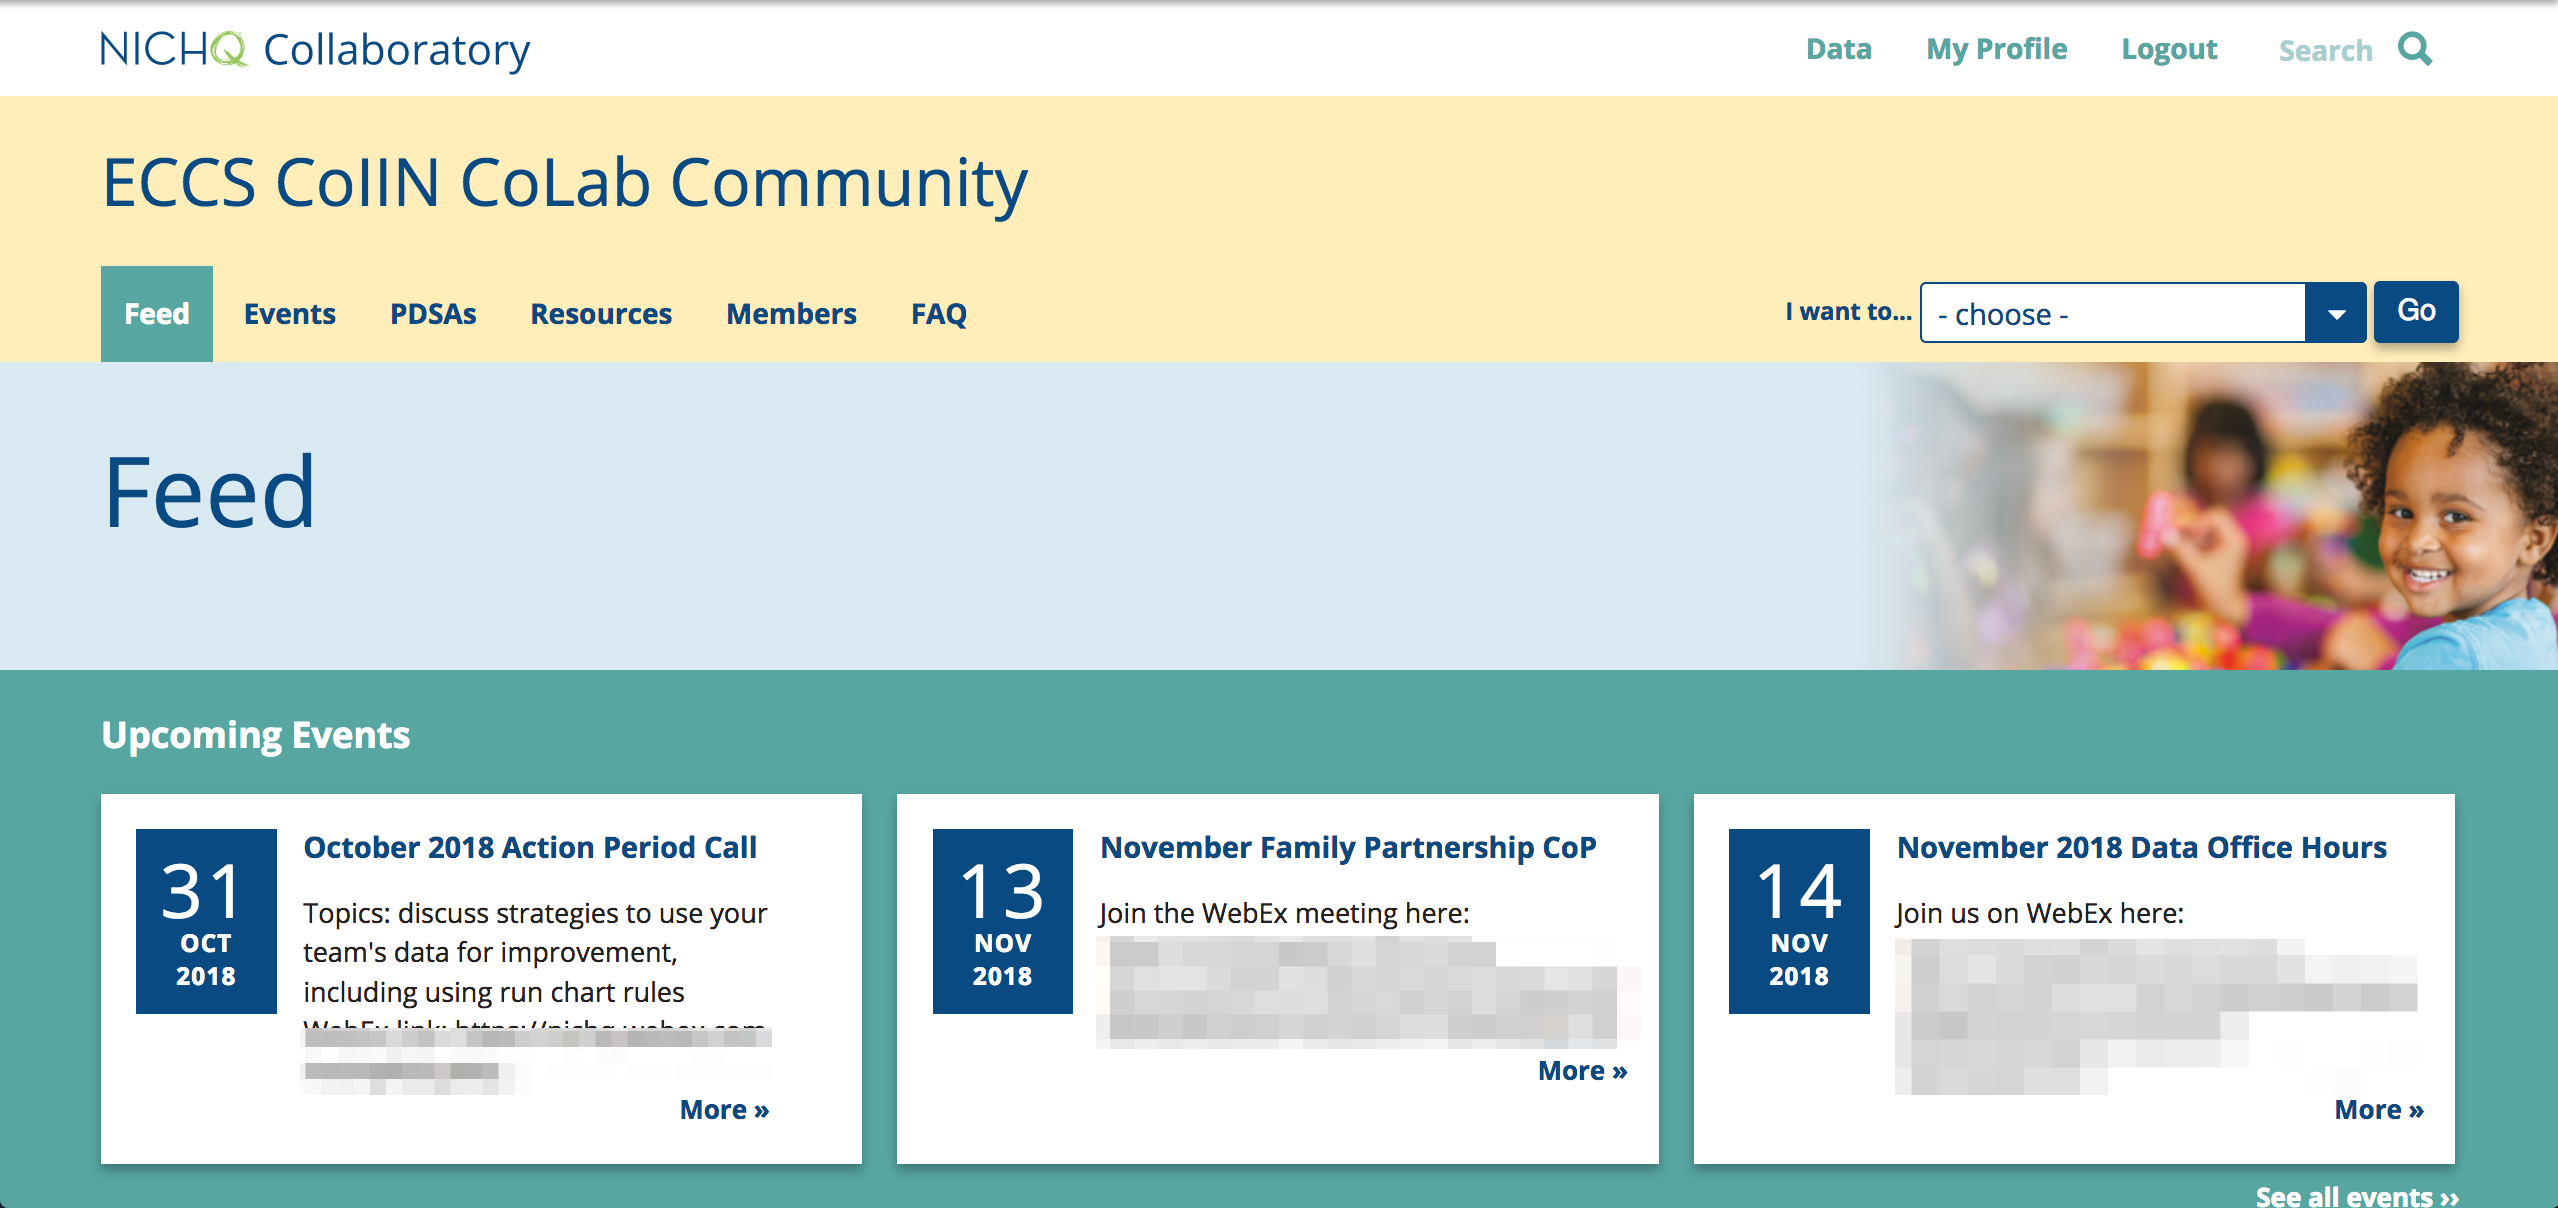
Navigator Immigrant Integration Program (coming soon!)
Curated by Immigrant Family Services Institute, the Immigrant Navigator was designed to provide information on educational events and social services for new Haitian Immigrants in order to ease their transition into life in the United States.
Thinking it would be a great place to work a day or two while in New York City for clients or DrupalCamps, Agaric dropped a few dollars in the Kickstarter fund for New Work City: Community Coworking Center for Independents in NY.

In recent posts we have explored the Migrate Plus and Migrate Tools modules. They extend the Migrate API to provide migrations defined as configuration entities, groups to share configuration among migrations, a user interface to execute migrations, among other things. Yet another benefit of using Migrate Plus is the option to leverage the many process plugins it provides. Today, we are going to learn about two of them: `entity_lookup` and `entity_generate`. We are going to compare them with the `migration_lookup` plugin, show how to configure them, and explain their compromises and limitations. Let’s get started.
What is the difference among the migration_lookup, entity_lookup, entity_generate plugins?
In the article about migration dependencies we covered the `migration_lookup` plugin provided by the core Migrate API. It lets you maintain relationships among entities that are being imported. For example, if you are migrating a node that has associated users, taxonomy terms, images, paragraphs, etc. This plugin has a very important restriction: the related entities must come from another migration. But what can you do if you need to reference entities that already exists system? You might already have users in Drupal that you want to assign as node authors. In that case, the `migration_lookup` plugin cannot be used, but `entity_lookup` can do the job.
The `entity_lookup` plugin is provided by the Migrate Plus module. You can use it to query any entity in the system and get its unique identifier. This is often used to populate entity reference fields, but it can be used to set any field or property in the destination. For example, you can query existing users and assign the `uid` node property which indicates who created the node. If no entity is found, the module returns a `NULL` value which you can use in combination of other plugins to provide a fallback behavior. The advantage of this plugin is that it does not require another migration. You can query any entity in the entire system.
The `entity_generate` plugin, also provided by the Migrate Plus module, is an extension of `entity_lookup`. If no entity is found, this plugin will automatically create one. For example, you might have a list of taxonomy terms to associate with a node. If some of the terms do not exist, you would like to create and relate them to the node.
Note: The `migration_lookup` offers a feature called stubbing that neither `entity_lookup` nor `entity_generate` provides. It allows you to create a placeholder entity that will be updated later in the migration process. For example, in a hierarchical taxonomy terms migration, it is possible that a term is migrated before its parent. In that case, a stub for the parent will be created and later updated with the real data.
Getting the example code
You can get the full code example at https://github.com/dinarcon/ud_migrations The module to enable is `UD Config entity_lookup and entity_generate examples` whose machine name is `ud_migrations_config_entity_lookup_entity_generate`. It comes with one JSON migrations: `udm_config_entity_lookup_entity_generate_node`. Read this article for details on migrating from JSON files. The following snippet shows a sample of the file:
{
  "data": {
    "udm_nodes": [
      {
        "unique_id": 1,
        "thoughtful_title": "Amazing recipe",
        "creative_author": "udm_user",
        "fruit_list": "Apple, Pear, Banana"
      },
      {...},
      {...},
      {...}
    ]
  }
}
Additionally, the example module creates three users upon installation: 'udm_user', 'udm_usuario', and 'udm_utilisateur'. They are deleted automatically when the module is uninstalled. They will be used to assign the node authors. The example will create nodes of types "Article" from the standard installation profile. You can execute the migration from the interface provided by Migrate Tools at `/admin/structure/migrate/manage/default/migrations`.
Using the entity_lookup to assign the node author
Let’s start by assigning the node author. The following snippet shows how to configure the `entity_lookup` plugin to assign the node author:
uid:
  - plugin: entity_lookup
    entity_type: user
    value_key: name
    source: src_creative_author
  - plugin: default_value
    default_value: 1
The `uid` node property is used to assign the node author. It expects an integer value representing a user ID (`uid`). The source data contains usernames so we need to query the database to get the corresponding user IDs. The users that will be referenced were not imported using the Migrate API. They were already in the system. Therefore, `migration_lookup` cannot be used, but `entity_lookup` can.
The plugin is configured using three keys. `entity_type` is set to machine name of the entity to query: `user` in this case. `value_key` is the name of the entity property to lookup. In Drupal, the usernames are stored in a property called `name`. Finally, `source` specifies which field from the source contains the lookup value for the `name` entity property. For example, the first record has a `src_creative_author` value of `udm_user`. So, this plugin will instruct Drupal to search among all the users in the system one whose `name` (username) is `udm_user`. If a value if found, the plugin will return the user ID. Because the `uid` node property expects a user ID, the return value of this plugin can be used directly to assign its value.
What happens if the plugin does not find an entity matching the conditions? It returns a `NULL` value. Then it is up to you to decide what to do. If you let the `NULL` value pass through, Drupal will take some default behavior. In the case of the `uid` property, if the received value is not valid, the node creation will be attributed to the anonymous user (uid: 0). Alternatively, you can detect if `NULL` is returned and take some action. In the example, the second record specifies the "udm_not_found" user which does not exists. To accommodate for this, a process pipeline is defined to manually specify a user if `entity_lookup` did not find one. The `default_value` plugin is used to return `1` in that case. The number represents a user ID, not a username. Particularly, this is the user ID of "super user" created when Drupal was first installed. If you need to assign a different user, but the user ID is unknown, you can create a pseudofield and use the `entity_lookup` plugin again to finds its user ID. Then, use that pseudofield as the default value.
Important: User entities do not have bundles. Do not set the `bundle_key` nor `bundle` configuration options of the `entity_lookup`. Otherwise, you will get the following error: "The entity_lookup plugin found no bundle but destination entity requires one." Files do not have bundles either. For entities that have bundles like nodes and taxonomy terms, those options need to be set in the `entity_lookup` plugin.
Using the entity_generate to assign and create taxonomy terms
Now, let’s migrate a comma separated list of taxonomy terms. An example value is `Apple, Pear, Banana`. The following snippet shows how to configure the `entity_generate` plugin to look up taxonomy terms and create them on the fly if they do not exist:
field_tags:
  - plugin: skip_on_empty
    source: src_fruit_list
    method: process
    message: 'No src_fruit_list listed.'
  - plugin: explode
    delimiter: ','
  - plugin: callback
    callable: trim
  - plugin: entity_generate
    entity_type: taxonomy_term
    value_key: name
    bundle_key: vid
    bundle: tags
The terms will be assigned to the `field_tags` field using a process pipeline of four plugins:
- `skip_on_empty` will skip the processing of this field if the record does not have a `src_fruit_list` column.
- `explode` will break the string of comma separated files into individual elements.
- `callback` will use the `trim` PHP function to remove any whitespace from the start or end of the taxonomy term name.
- `entity_generate` takes care of finding the taxonomy terms in the system and creating the ones that do not exist.
For a detailed explanation of the `skip_on_empty` and `explode` plugins see this article. For the `callback` plugin see this article. Let’s focus on the `entity_generate` plugin for now. The `field_tags` field expects an array of taxonomy terms IDs (`tid`). The source data contains term names so we need to query the database to get the corresponding term IDs. The taxonomy terms that will be referenced were not imported using the Migrate API. And they might exist in the system yet. If that is the case, they should be created on the fly. Therefore, `migration_lookup` cannot be used, but `entity_generate` can.
The plugin is configured using five keys. `entity_type` is set to machine name of the entity to query: `taxonomy_term` in this case. `value_key` is the name of the entity property to lookup. In Drupal, the taxonomy term names are stored in a property called `name`. Usually, you would include a `source` that specifies which field from the source contains the lookup value for the `name` entity property. In this case it is not necessary to define this configuration option. The lookup value will be passed from the previous plugin in the process pipeline. In this case, the trimmed version of the taxonomy term name.
If, and only if, the entity type has bundles, you also must define two more configuration options: `bundle_key` and `bundle`. Similar to `value_key` and `source`, these extra options will become another condition in the query looking for the entities. `bundle_key` is the name of the entity property that stores which bundle the entity belongs to. `bundle` contains the value of the bundle used to restrict the search. The terminology is a bit confusing, but it boils down to the following. It is possible that the same value exists in multiple bundles of the same entity. So, you must pick one bundle where the lookup operation will be performed. In the case of the taxonomy term entity, the bundles are the vocabularies. Which vocabulary a term belongs to is associated in the `vid` entity property. In the example, that is `tags`. Let’s consider an example term of "Apple". So, this plugin will instruct Drupal to search for a taxonomy term whose `name` (term name) is "Apple" that belongs to the "tags" `vid` (vocabulary).
What happens if the plugin does not find an entity matching the conditions? It will create one on the fly! It will use the value from the source configuration or from the process pipeline. This value will be used to assign the `value_key` entity property for the newly created entity. The entity will be created in the proper bundle as specified by the `bundle_key` and `bundle` configuration options. In the example, the terms will be created in the `tags` vocabulary. It is important to note that values are trimmed to remove whispaces at the start and end of the name. Otherwise, if your source contains spaces after the commas that separate elements, you might end up with terms that seem duplicated like "Apple" and " Apple".
More configuration options
Both `entity_lookup` and `entity_generate` share the previous configuration options. Additionally, the following options are only available:
`ignore_case` contains a boolean value to indicate if the query should be case sensitive or not. It defaults to true.
`access_check` contains a boolean value to indicate if the system should check whether the user has access to the entity. It defaults to true.
`values` and `default_values` apply only to the `entity_generate` plugin. You can use them to set fields that could exist in the destination entity. An example configuration is included in the code for the plugin.
One interesting fact about these plugins is that none of the configuration options is required. The `source` can be skipped if the value comes from the process pipeline. The rest of the configuration options can be inferred by code introspection. This has some restrictions and assumptions. For example, if you are migrating nodes, the code introspection requires the `type` node property defined in the process section. If you do not set one because you define a `default_bundle` in the destination section, an error will be produced. Similarly, for entity reference fields it is assumed they point to one bundle only. Otherwise, the system cannot guess which bundle to lookup and an error will be produced. Therefore, always set the `entity_type` and `value_key` configurations. And for entity types that have bundles, `bundle_key` and `bundle` must be set as well.
Note: There are various open issues contemplating changes to the configuration options. See this issue and the related ones to keep up to date with any future change.
Compromises and limitations
The `entity_lookup` and `entity_generate` plugins violate some ETL principles. For example, they query the destination system from the process section. And in the case of `entity_generate` it even creates entities from the process section. Ideally, each phase of the ETL process is self contained. That being said, there are valid uses cases to use these plugins and they can you save time when their functionality is needed.
An important limitation of the `entity_generate` plugin is that it is not able to clean after itself. That is, if you rollback the migration that calls this plugin, any created entity will remain in the system. This would leave data that is potentially invalid or otherwise never used in Drupal. Those values could leak into the user interface like in autocomplete fields. Ideally, rolling back a migration should delete any data that was created with it.
The recommended way to maintain relationships among entities in a migration project is to have multiple migrations. Then, you use the `migration_lookup` plugin to relate them. Throughout the series, several examples have been presented. For example, this article shows how to do taxonomy term migrations.
What did you learn in today’s blog post? Did you know how to configure these plugins for entities that do not have bundles? Did you know that reverting a migration does not delete entities created by the `entity_generate` plugin? Did you know you can assign fields in the generated entity? Share your answers in the comments. Also, I would be grateful if you shared this blog post with others.
Next: How to debug Drupal migrations - Part 1
This blog post series, cross-posted at UnderstandDrupal.com as well as here on Agaric.coop, is made possible thanks to these generous sponsors. Contact Understand Drupal if your organization would like to support this documentation project, whether it is the migration series or other topics.
In the 31 days of Drupal migrations series, we explained different aspects of the syntax used by the Migrate API. In today’s article, we are going to dive deeper to understand how the API interprets our migration definition files. We will explain how to configure process plugins and set subfields and deltas for multi-value field migrations. We will also talk about process plugin chains, source constants, pseudofields, and the process pipeline. After reading this article, you will better comprehend existing migration definition files and improve your own. Let’s get started.
Field mappings: process plugin configuration
The Migrate API provides syntactic sugar to make migration definition files more readable. The field mappings under the process section are a good example of this. To demonstrate the syntax consider a multi-value Link field to store links to online profiles. The field machine name is field_online_profiles and it is configured to accept the URL and the link text. For brevity, only the `process` section will be shown, but it is assumed that the source includes the following columns: `source_drupal_profile`, `source_gitlab_profile`, and `source_github_profile`.
process:
  field_online_profiles: source_drupal_profile
In this case, we are directly assigning the value from source_drupal_profile in the source to the field_online_profiles in the destination entity. For now, we are ignoring the fact that the field accepts multiple values. We are setting the link text either, just the URL. Even in this example, the Migrate API is making some assumptions for us. Every field mapping requires at least one process plugin to be configured. If none is set, the get plugin is assumed. It copies a value from the source to the destination without making any changes. The previous snippet is equivalent to the next one:
process:
  field_online_profiles:
    plugin: get
    source: source_drupal_profile
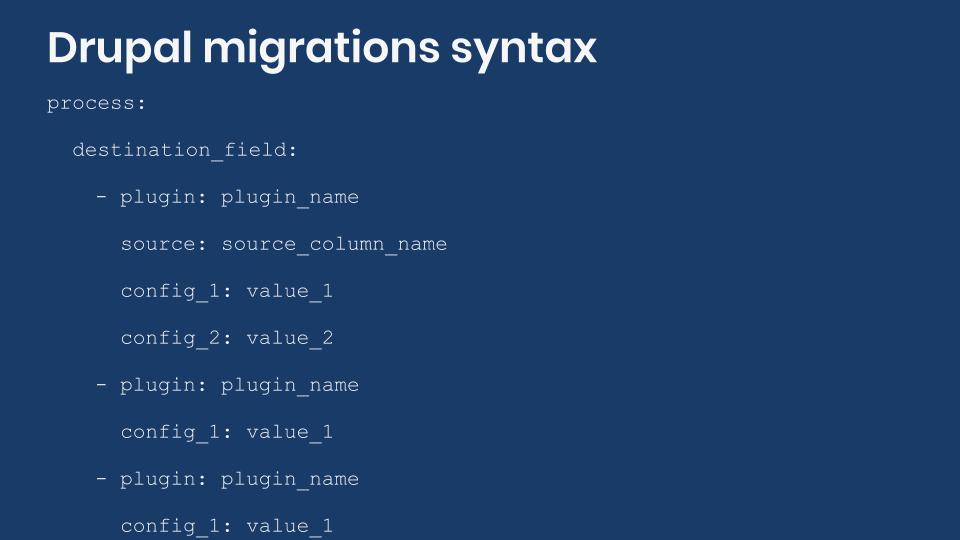
The process plugin configuration options should be placed as direct children of the field that is being mapped. In the previous snippet, plugin and source are indented one level to the right under field_online_profiles. There are many process plugins provided by Drupal core and contributed modules. Their configuration can be generalized as follows:
process:
  destination_field:
    plugin: plugin_name
    config_1: value_1
    config_2: value_2
    config_3: value_3
Check out the article on using process plugins for data transformation for a working example.
Field mappings: setting sub-fields
Let's expand the example by setting the a value for the Link text in addition to the URL. To accomplish this, we will migrate data into subfields. Fields can store complex data and in many cases they have multiple components. For example, a rich text field has a subfield to store the text value and another for the text format. Address fields have 13 subfields available. Our example uses Link fields which have three subfields:
uri: The URI of the link.title: The link text.options: Serialized array of options for the link.
For now, only the uri and title subfields will be set. This also demonstrates that, depending on the field, it is not necessary to provide values for all the subfields. One more thing we will implement is to include the name of the online profile in the Link text. For example: “Drupal.org profile”.
process:
  field_online_profiles/uri: source_drupal_profile
  field_online_profiles/title:
    plugin: default_value
    default_value: 'Drupal.org profile'
If you want to set a value for a subfield, you use the field_name/subfield syntax. Then, each subfield can define its own mapping. Note that when setting the uri we are taking advantage of the get plugin considered the default to simplify the value assignment. In the case of title, the default_value process plugin is used to set a fixed value to comply with our example requirement.
When setting subfields, it is very important to understand what format is expected. You need to make sure the process plugins return data in the expected format or the migration will fail. In particular, you need to know if they return a scalar value or an array. In the case of scalar values, you need to verify if numbers or strings are expected. In the previous example, the uri subfield of the Link field expects a string containing the URL. On the other hand, File fields have a target_id subfield that expects an integer representing the File ID that is being referenced. Some process plugins might return an array or let you set subfields directly as part of the plugin configuration. For an example of the latter, have a look at the article on migrating images using the image_import plugin. image_import lets you set the alt, title, width, and height subfields for images directly in the plugin configuration. The following snippets shows a generalization for setting subfields:
process:
  destination_field/subfield_1:
    plugin: plugin_name
    config_1: value_1
    config_2: value_2
  destination_field/subfield_2:
    plugin: plugin_name
    config_1: value_1
    config_2: value_2
If a field can have multiple subfields, how can I know which ones are available? For easy reference, our next blog post will include a list of subfields for different types of fields. To find out by yourself, check out this article that covers available subfields. In summary, you need to locate the class that provides the FieldType plugin and inspect its schema method. The latter defines the database columns used by the field to store its data. Because of object oriented practices, sometimes you need to look at the parent class to know all the subfields that are available. When migrating into subfields, you are actually migrating into those particular database columns. Any restriction set by the database schema needs to be respected. Link fields are provided by the LinkItem class whose schema method defines the three subfields we listed before.
If a field can have multiple subfields, how does the Migrate API know which one to set when no one is manually specified? Every Drupal field has at least one subfield. If they have more, the field type itself specifies which one is the default. For easy reference, our next blog post will indicate the default subfield for different types of fields. To find out by yourself, check out this article that covers default subfields. In summary, you need to locate the class that provides the FieldType plugin and inspect its mainPropertyName method. Its return value will be the default subfield used by the Migrate API. Because of object oriented practices, sometimes you need to look at the parent class to find the method that defines the default subfield. Link fields are provided by the LinkItem class whose mainPropertyName returns uri. That is why in the first example there was no need to specify a subfield to set the value for the link URL.
Field mappings: setting deltas for multi-value fields
Once more, let’s expand the example by setting the populating multiple values for the same field. To accomplish this, we will specify field deltas. A delta is a numeric index starting at 0 and incrementing by 1 for each subsequent element in the multi-value field. Remember that our example assumes that the source has the following columns: source_drupal_profile, source_gitlab_profile, and source_github_profile. One way to migrate all of them into the multi-value link field is:
process:
  field_online_profiles/0/uri: source_drupal_profile
  field_online_profiles/0/title:
    plugin: default_value
    default_value: 'Drupal.org profile'
  field_online_profiles/1/uri: source_gitlab_profile
  field_online_profiles/1/title:
    plugin: default_value
    default_value: 'GitLab profile'
  field_online_profiles/2/uri: source_github_profile
  field_online_profiles/2/title:
    plugin: default_value
    default_value: 'GitHub profile'
If you want to set a value for a subfield, you use the field_name/delta/subfield syntax. Then, every combination of delta and subfield can define its own mapping. Both delta and subfield are optional. If no delta is specified, 0 is assumed which corresponds to the first element of a (multi-value) field. If no subfield is specified, the default subfield is assumed as explained before. In the previous example, if there is no need to set the link text the configuration would become:
process:
  field_online_profiles/0: source_drupal_profile
  field_online_profiles/1: source_gitlab_profile
  field_online_profiles/2: source_github_profile
In this example, we wanted to highlight syntax variations that can be used with the Migrate API. Nevertheless, this way of migrating multi-value fields is not very flexible. You are required to know in advance how many deltas you want to migrate. Depending on your particular configurations, you can write complex process pipelines that take into account an unknown number of deltas. Sometimes, writing a custom migration process plugin is easier and/or the only option to accomplish a task. Even if you can write a migration with existing process plugins, that might not be the best solution. When writing migrations, strive for them to be easy to read, understand, and maintain. For reference, the generic configuration for mapping fields with deltas and subfields is:
process:
  destination_field/0/subfield_1:
    plugin: plugin_name
    config_1: value_1
    config_2: value_2
  destination_field/0/subfield_2:
    plugin: plugin_name
    config_1: value_1
    config_2: value_2
  destination_field/1/subfield_1:
    plugin: plugin_name
    config_1: value_1
    config_2: value_2
  destination_field/1/subfield_2:
    plugin: plugin_name
    config_1: value_1
    config_2: value_2
Process plugin chains
So far, for every field_name/delta/subfield combination we only have used one process plugin. The Migrate API does not impose any restrictions to the number of transformations that the source data can undergo before being assigned to a destination property or field. You can have as many as needed. Chaining of process plugins works similarly to Unix pipelines in that the output of one process plugin becomes the input of the next one in the chain. When the last plugin in the chain completes its transformation, the return value is assigned. We have covered this topic in greater detail in the article on using process plugins for data transformation. For now, let’s consider an example chain of two process plugins:
process:
  title:
    - plugin: concat
      source:
        - source_first_name
        - source_last_name
      delimiter: ' '
    - plugin: callback
      callable: strtoupper
In this example, we are using the concat plugin to glue together the source_first_name and source_last_name. A space is placed in between as specified by the delimiter configuration. The result of this is later passed to the callback plugin which executes the strtoupper PHP function on the concatenated value effectively making the string uppercase. Because there are no more process plugins in the chain, the string transformed to uppercase is assigned to the title destination property. If source_first_name is ‘Mauricio’ and source_last_name is ‘Dinarte’, then title would be set to ‘MAURICIO DINARTE’. Refer to the article mentioned before for other things to consider when manipulating strings. The configuration of process plugin chains can be generalized as follows:
process:
  destination_field:
    - plugin: plugin_name
      source: source_column_name
      config_1: value_1
      config_2: value_2
    - plugin: plugin_name
      config_1: value_1
      config_2: value_2
    - plugin: plugin_name
      config_1: value_1
      config_2: value_2
It is very important to note that only the first process plugin in the chain should set a source configuration. Remember that the output of the previous process plugin is the input for the next one. Setting the source configuration in subsequent process plugins is unnecessary and can actually make the chain produce unexpected results or fail altogether.
Source constants, pseudofields, and the process pipeline
We have covered source constants, pseudo-fields, and the process pipeline in the article on using data placeholders in the migration process. This time, we are only going to give an overview to explain their syntax. Constants are arbitrary values that can be used later in the process pipeline. They are set as direct children of the source section. Let’s consider this example:
source:
  constant:
    DRUPAL_LINK_TITLE: 'Drupal.org profile'
    GITLAB_LINK_TITLE: 'GitLab profile'
    GITHUB_LINK_TITLE: 'GitHub profile'
process:
  field_online_profiles/0/uri: source_drupal_profile
  field_online_profiles/0/title: constant/DRUPAL_LINK_TITLE
  field_online_profiles/1/uri: source_gitlab_profile
  field_online_profiles/1/title: constant/GITLAB_LINK_TITLE
  field_online_profiles/2/uri: source_github_profile
  field_online_profiles/2/title: constant/GITHUB_LINK_TITLE
To define source constants, you write a constants key and set its value to an array of name-value pairs. When you need to refer to them in the process section, you use constant/NAME and they behave like any other column present in the source. Although not required, it is customary to name constants in uppercase. This makes it easier to distinguish them from regular source columns. Notice how their use makes assigning the link titles simpler. Instead of using the default_value plugin, we read the value directly from the source constants.
Pseudofields also store arbitrary values for use later, but they are defined in the process section. Their names can be arbitrary as long as they do not conflict with a property name or field name in the destination. The value can be set to a verbatim copy from the source (a column or a constant) or they can use process plugins for data transformations. For the next example, consider that there is no need for the link text to be different among online profiles. Additionally, there is another Link field that can only store one value. This new field is used to store the URL to the primary profile. The example can be rewritten as follows:
source:
  constant:
    LINK_TITLE: 'Online profile'
process:
  pseudo_link_text:
    - plugin: get
      source: constant/LINK_TITLE
    - plugin: callback
      callable: strtoupper
  field_online_profiles/0/uri: source_drupal_profile
  field_online_profiles/0/title: '@pseudo_link_text'
  field_online_profiles/1/uri: source_gitlab_profile
  field_online_profiles/1/title: '@pseudo_link_text'
  field_online_profiles/2/uri: source_github_profile
  field_online_profiles/2/title: '@pseudo_link_text'
  field_primary_profile: '@field_online_profiles/0'
A psedofield named pseudo_link_text has been created. It has its own process pipeline to provide the link text that will be used for all online profiles. When you want to use the pseudo, you have to enclose it in quotes (') and prepend an at sign (@) to the name. The pseudo_ prefix in the name is not required. In this case it is used to make it easier to distinguish among pseudofields and regular property or field names.
The previous snippets is also a good example of how the migrate process pipeline works. When setting field_primary_profile, we are reusing a value stored in another field: the first delta of field_online_profiles. There are many things to note here:
- The migrate process pipeline lets you reuse anything that has been defined previously in the file. It can be source constants, pseudo fields, or regular destination properties and fields. The only requirement is that whatever you want to use needs to be previously defined in the migration definition file.
- Source columns are accessed directly by name. Source constants are accessed using the
constant/NAMEsyntax. - Any element defined in the
processsection can be reused later in the process pipeline by enclosing its name in quotes (') and prepending an at sign (@). This applies to pseudofields and regular destination properties and fields.
When reusing an element in the process pipeline, its whole structure becomes available. In the previous example, we set field_primary_profile to '@field_online_profiles/0'. This means that all subfields in the first delta of the field_online_profiles field will be assigned to field_primary_profile. Effectively this means both the uri and title properties will be set. Be mindful that when you reuse a field, all its delta and subfields are copied along unless specifically restricted. For example, if you only want to reuse the uri of the first delta you would use '@field_online_profiles/0/uri'. In none of these scenarios, indicating that you want to reuse something guarantees that it will be stored in the new element assignment. For example, the field_primary_profile field only accepts one value. Even if we used '@field_online_profiles' to reuse all the deltas of the multi-value field, only the first one will be stored per the field's (cardinality) definition.
The Migrate API is pretty flexible and you can write very complex process pipelines. The examples we have presented today have been exaggerated to demonstrate many syntax variations. Again, when writing migrations, strive for process pipelines that are easy to read, understand, and maintain.
What did you learn in today's article? Did you know that it is possible to specify deltas and subfields in field mappings? Were you aware that process plugins can be chained for multiple data transformations? How have you used source constants and psuedofield before? Please share your answers in the comments. Also, we would be grateful if you shared this article with your friends and colleagues.
Agaric's newsletter will contain news updates and links to blog posts and articles on a variety of topics:
- Agaric's Free Software Platforms and the communities using them
- Free Software tools that we use and development projects that we support
- Agaric's regular online community events
- Strategies and ideas for democratizing technology
- Strategies for protecting your data and privacy
- The variety of services that we offer
- News regarding cooperatives, organizations, and movements in our solidarity network
Sign Up
Throughout the series, we explored many migration topics. We started with an overview of the ETL process and workflows for managing migrations. Then, we presented example migrations for different entities: nodes, files, images, taxonomy terms, users, and paragraphs. Next, we shifted focus to migrations from different sources: CSV, JSON, XML, Google Sheet, Microsoft Excel, and LibreOffice Calc files. Later, we explored how to manage migrations as configuration, use groups to share configuration, and execute migrations from the user interface. Finally, we gave recommendations and provided tools for debugging migrations from the command line and the user interface. Although we covered a lot of ground, we only scratched the surface. The Migrate API is so flexible that its use cases are virtually endless. To wrap up the series, we present an introduction to a very popular topic: Drupal upgrades. Let’s get started.
Note: In this article, when we talk about Drupal 7, the same applies to Drupal 6.
What is a Drupal upgrade?
The information we presented in the series is generic enough that it applies to many types of Drupal migrations. There is one particular use case that stands out from the rest: Drupal upgrades. An upgrade is the process of taking your existing Drupal site and copy its configuration and content over to a new major version of Drupal. For example, going from Drupal 6 or 7 to Drupal 8. The following is an oversimplification of the workflow to perform the upgrade process:
- Install a fresh Drupal 8 site.
- Add credentials so that the new site can connect to Drupal 7’s database.
- Use the Migrate API to generate migration definition files. They will copy over Drupal 7’s configuration and content. This step is only about generating the YAML files.
- Execute those migrations to bring the configuration and content over to Drupal 8.
Preparing your migration
Any migration project requires a good plan of action, but this is particularly important for Drupal upgrades. You need to have a general sense of how the upgrade process works, what assumptions are made by the system, and what limitations exist. Read this article for more details on how to prepare a site for upgrading it to Drupal 8. Some highlights include:
- Both sites need to be in the latest stable version of their corresponding branch. That means the latest release of Drupal 7 and 8 at the time of performing the upgrade process. This also applies to any contributed module.
- Do not do any configuration of the Drupal 8 site until the upgrade process is completed. Any configuration you make will be overridden, and there is no need for it anyways. Part of the process includes recreating the old site’s configuration: content types, fields, taxonomy vocabularies, etc.
- Do not create content on the Drupal 8 site until the upgrade process is completed. The upgrade process will keep the unique identifiers from the source site: `nid`, `uid`, `tid`, `fid`, etc. If you were to create content, the references among entities could be broken when the upgrade process overrides the unique identifiers. To prevent data loss, wait until the old site's content has been migrated to start adding content to the new site.
- For the system to detect a module’s configuration to be upgraded automatically, it has to be enabled on both sites. This applies to contributed modules in Drupal 7 (e.g., link) that were moved to core in Drupal 8. Also to Drupal 7 modules (e.g. address field) that were superseded by a different one in Drupal 8 (e.g. address). In any of those cases, as long as the modules are enabled on both ends, their configuration and content will be migrated. This assumes that the Drupal 8 counterpart offers an automatic upgrade path.
- Some modules do not offer automatic upgrade paths. The primary example is the Views module. This means that any view created in Drupal 7 needs to be manually recreated in Drupal 8.
- The upgrade procedure is all about moving data, not logic in custom code. If you have custom modules, the custom code needs to be ported separately. If those modules store data in Drupal’s database, you can use the Migrate API to move it over to the new site.
- Similarly, you will have to recreate the theme from scratch. Drupal 8 introduced Twig which is significantly different to the PHPTemplate engine used by Drupal 7.
Customizing your migration
Note that the creation and execution of the migration files are separate steps. Upgrading to a major version of Drupal is often a good opportunity to introduce changes to the website. For example, you might want to change the content modeling, navigation, user permissions, etc. To accomplish that, you can modify the generated migration files to account for any scenario where the new site’s configuration diverts from the old one. And only when you are done with the customizations, you execute the migrations. Examples of things that could change include:
- Combining or breaking apart content types.
- Moving data about people from node entities to user entities, or vice versa.
- Renaming content types, fields, taxonomy vocabularies and terms, etc.
- Changing field types. For example, going from Address Field module in Drupal 7 to Address module in Drupal 8.
- Merging multiple taxonomy vocabularies into one.
- Changing how your content is structured. For example, going from a monolithic body field to paragraph entities.
- Changing how your multimedia files are stored. For example, going from image fields to media entities.
Performing the upgrade
There are two options to perform the upgrade. In both cases, the process is initiated from the Drupal 8 site. One way is using the Migrate Drupal UI core module to perform the upgrade from the browser’s user interface. When the module is enabled, go to `/upgrade` and provide the database credentials of the Drupal 7 site. Based on the installed modules on both sites, the system will give you a report of what can be automatically upgraded. Consider the limitations explained above. While the upgrade process is running, you will see a stream of messages about the operation. These messages are logged to the database so you can read them after the upgrade is completed. If your dataset is big or there are many expensive operations like password encryption, the process can take too long to complete or fail altogether.
The other way to perform the upgrade procedure is from the command line using Drush. This requires the Migrate Upgrade contributed module. When enabled, it adds Drush commands to import and rollback a full upgrade operation. You can provide database connection details of the old site via command line options. One benefit of using this approach is that you can create the migration files without running them. This lets you do customizations as explained above. When you are done, you can run the migrations following the same workflow of manually created ones.
Known issues and limitations
Depending on whether you are upgrading from Drupal 6 or 7, there is a list of known issues you need to be aware of. Read this article for more information. One area that can be tricky is multilingual support. As of this writing, the upgrade path for multilingual sites is not complete. Limited support is available via the Migrate Drupal Multilingual core module. There are many things to consider when working with multilingual migrations. For example, are you using node or field translations? Do entities have revisions? Read this article for more information.
Upgrade paths for contributed modules
The automatic upgrade procedure only supports Drupal core modules. This includes modules that were added to core in Drupal 8. For any other contributed module, it is the maintainers’ decision to include an automatic upgrade path or not. For example, the Geofield module provides an upgrade path. It is also possible that a module in Drupal 8 offers an upgrade path from a different module in Drupal 7. For example, the Address module provides an upgrade path from the Address Field module. Drupal Commerce also provides some support via the Commerce Migrate module.
Not every module offers an automated upgrade path. In such cases, you can write custom plugins which ideally are contributed back to Drupal.org ;-) Or you can use the techniques learned in the series to transform your source data into the structures expected by Drupal 8. In both cases, having a broad understanding of the Migrate API will be very useful.
Upgrade strategies
There are multiple migration strategies. You might even consider manually recreating the content if there is only a handful of data to move. Or you might decide to use the Migrate API to upgrade part of the site automatically and do a manual copy of a different portion of it. You might want to execute a fully automated upgrade procedure and manually clean up edge cases afterward. Or you might want to customize the migrations to account for those edge cases already. Michael Anello created an insightful presentation on different migration strategies. Our tips for writing migrations apply as well.
Drupal upgrades tend to be fun, challenging projects. The more you know about the Migrate API the easier it will be to complete the project. We enjoyed writing this overview of the Drupal Migrate API. We would love to work on a follow up series focused on Drupal upgrades. If you or your organization could sponsor such endeavor, please reach out to us via the site’s contact form.
What about upgrading to Drupal 9?
In March 2017, project lead Dries Buytaert announced a plan to make Drupal upgrades easier forever. This was reinforced during his keynote at DrupalCon Seattle 2019. You can watch the video recording in this link. In short, Drupal 9.0 will be the latest point release of Drupal 8 minus deprecated APIs. This has very important implications:
- When Drupal 9 is released, the Migrate API should be mostly the same as Drupal 8. Therefore, anything that you learn today will be useful for Drupal 9 as well.
- As long as your code does not use deprecated APIs, upgrading from Drupal 8 to Drupal 9 will be as easy as updating from Drupal 8.7 to 8.8.
- Because of this, there is no need to wait for Drupal 9 to upgrade your Drupal 6 or 7 site. You can upgrade to Drupal 8 today.
Thank you!
And that concludes the #31DaysOfMigration series. For joining us in this learning experience, thank you very much! ¡Muchas gracias! Merci beaucoup! :-D We are also very grateful to Agaric.coop, Drupalize.Me, and Centarro.io for sponsoring this series.
What did you learn in today’s blog post? Did you know the upgrade process is able to copy content and configuration? Did you know that you can execute the upgrade procedure either from the user interface or the command line? Share your answers in the comments. Also, we would be grateful if you shared this blog post with others.
This blog post series, cross-posted at UnderstandDrupal.com as well as here on Agaric.coop, is made possible thanks to these generous sponsors: Drupalize.me by Osio Labs has online tutorials about migrations, among other topics, and Agaric provides migration trainings, among other services. Contact Understand Drupal if your organization would like to support this documentation project, whether it is the migration series or other topics.
The major problem — one of the major problems, for there are several — one of the many major problems with governing people is that of whom you get to do it; or rather of who manages to get people to let them do it to them.
To summarize: it is a well-known fact that those people who must want to rule people are, ipso facto, those least suited to do it. To summarize the summary: anyone who is capable of getting themselves made President should on no account be allowed to do the job. To summarize the summary of the summary: people are a problem.
Chapter 28, The Restaurant at the End of the Universe, by Douglas Adams in the Hitchhiker's Guide to the Galaxy series.

